From a "cluttered island" to an "aerial studio"—it's time to reclaim your desk.
Have you ever been there? You’re trying to film an overhead unboxing video, but first, you have to shove your keyboard aside, clear a tiny patch of space, and precariously balance your phone against a stack of books, praying it doesn’t face-plant onto your product.
Or maybe you’re a DIY crafter or a food blogger. Every time you need a process shot, it triggers a "great desk migration." Water bottles, pen holders, and monitors all have to be moved just to find a few inches of floor space for a tripod leg.
The breaking point? You finally get the camera set up, only to realize you’re losing light. You squeeze in a desk lamp, and suddenly, your workspace is a "gear graveyard" where you can’t even move your mouse.
If your desk is suffering from this "space crisis," it’s time for a change of perspective: Don’t let your gear sit on your desk; let it fly.
Does Your Desk Really Need to Be That Big?
Think about it: when you’re filming or streaming, which pieces of gear actually need to occupy the tabletop?
- Camera/Phone: Needs to be at a specific height, pointed at the workspace.
- Key Light: Needs to illuminate the product and your face from a specific angle.
- Microphone: Needs to be near your mouth without blocking the shot.
In a traditional setup, each of these has its own "territory." A tripod has three legs; a light stand has three legs; add a desktop mic stand, and suddenly half your desk is gone.
But do these functions actually require a footprint on the table?
The Camera needs altitude (50-80cm directly above for top-down shots).
The Light needs an angle (usually 45° from the side).
The Mic needs proximity (10-20cm from the source).
The true "anchor point" for these tools isn’t the desk surface—it’s the desk edge. All they need is one solid pivot point to suspend your workspace above the tabletop. This is the philosophy of the Boom Arm: replace "standing" with "clamping," and "occupying space" with "hovering."
Why the Traditional Tripod Isn't Cutting It
You might say, "My tripod works fine; I just unfold it." That's true for occasional photos, but for serious creators, tripods have several fatal flaws:
- The Footprint: A standard tripod takes up as much space as a sheet of paper. Three tripods mean three sheets of paper—where do you put your coffee?
- Angle Limitations: Most tripods only move up and down. Achieving a perfect "top-down" shot in the center of a desk from the edge is nearly impossible without the whole thing tipping over.
- Adjustability Friction: Switching from overhead to eye-level? You have to collapse the legs, move the base, and reset. By the time you’re done, the inspiration is gone.
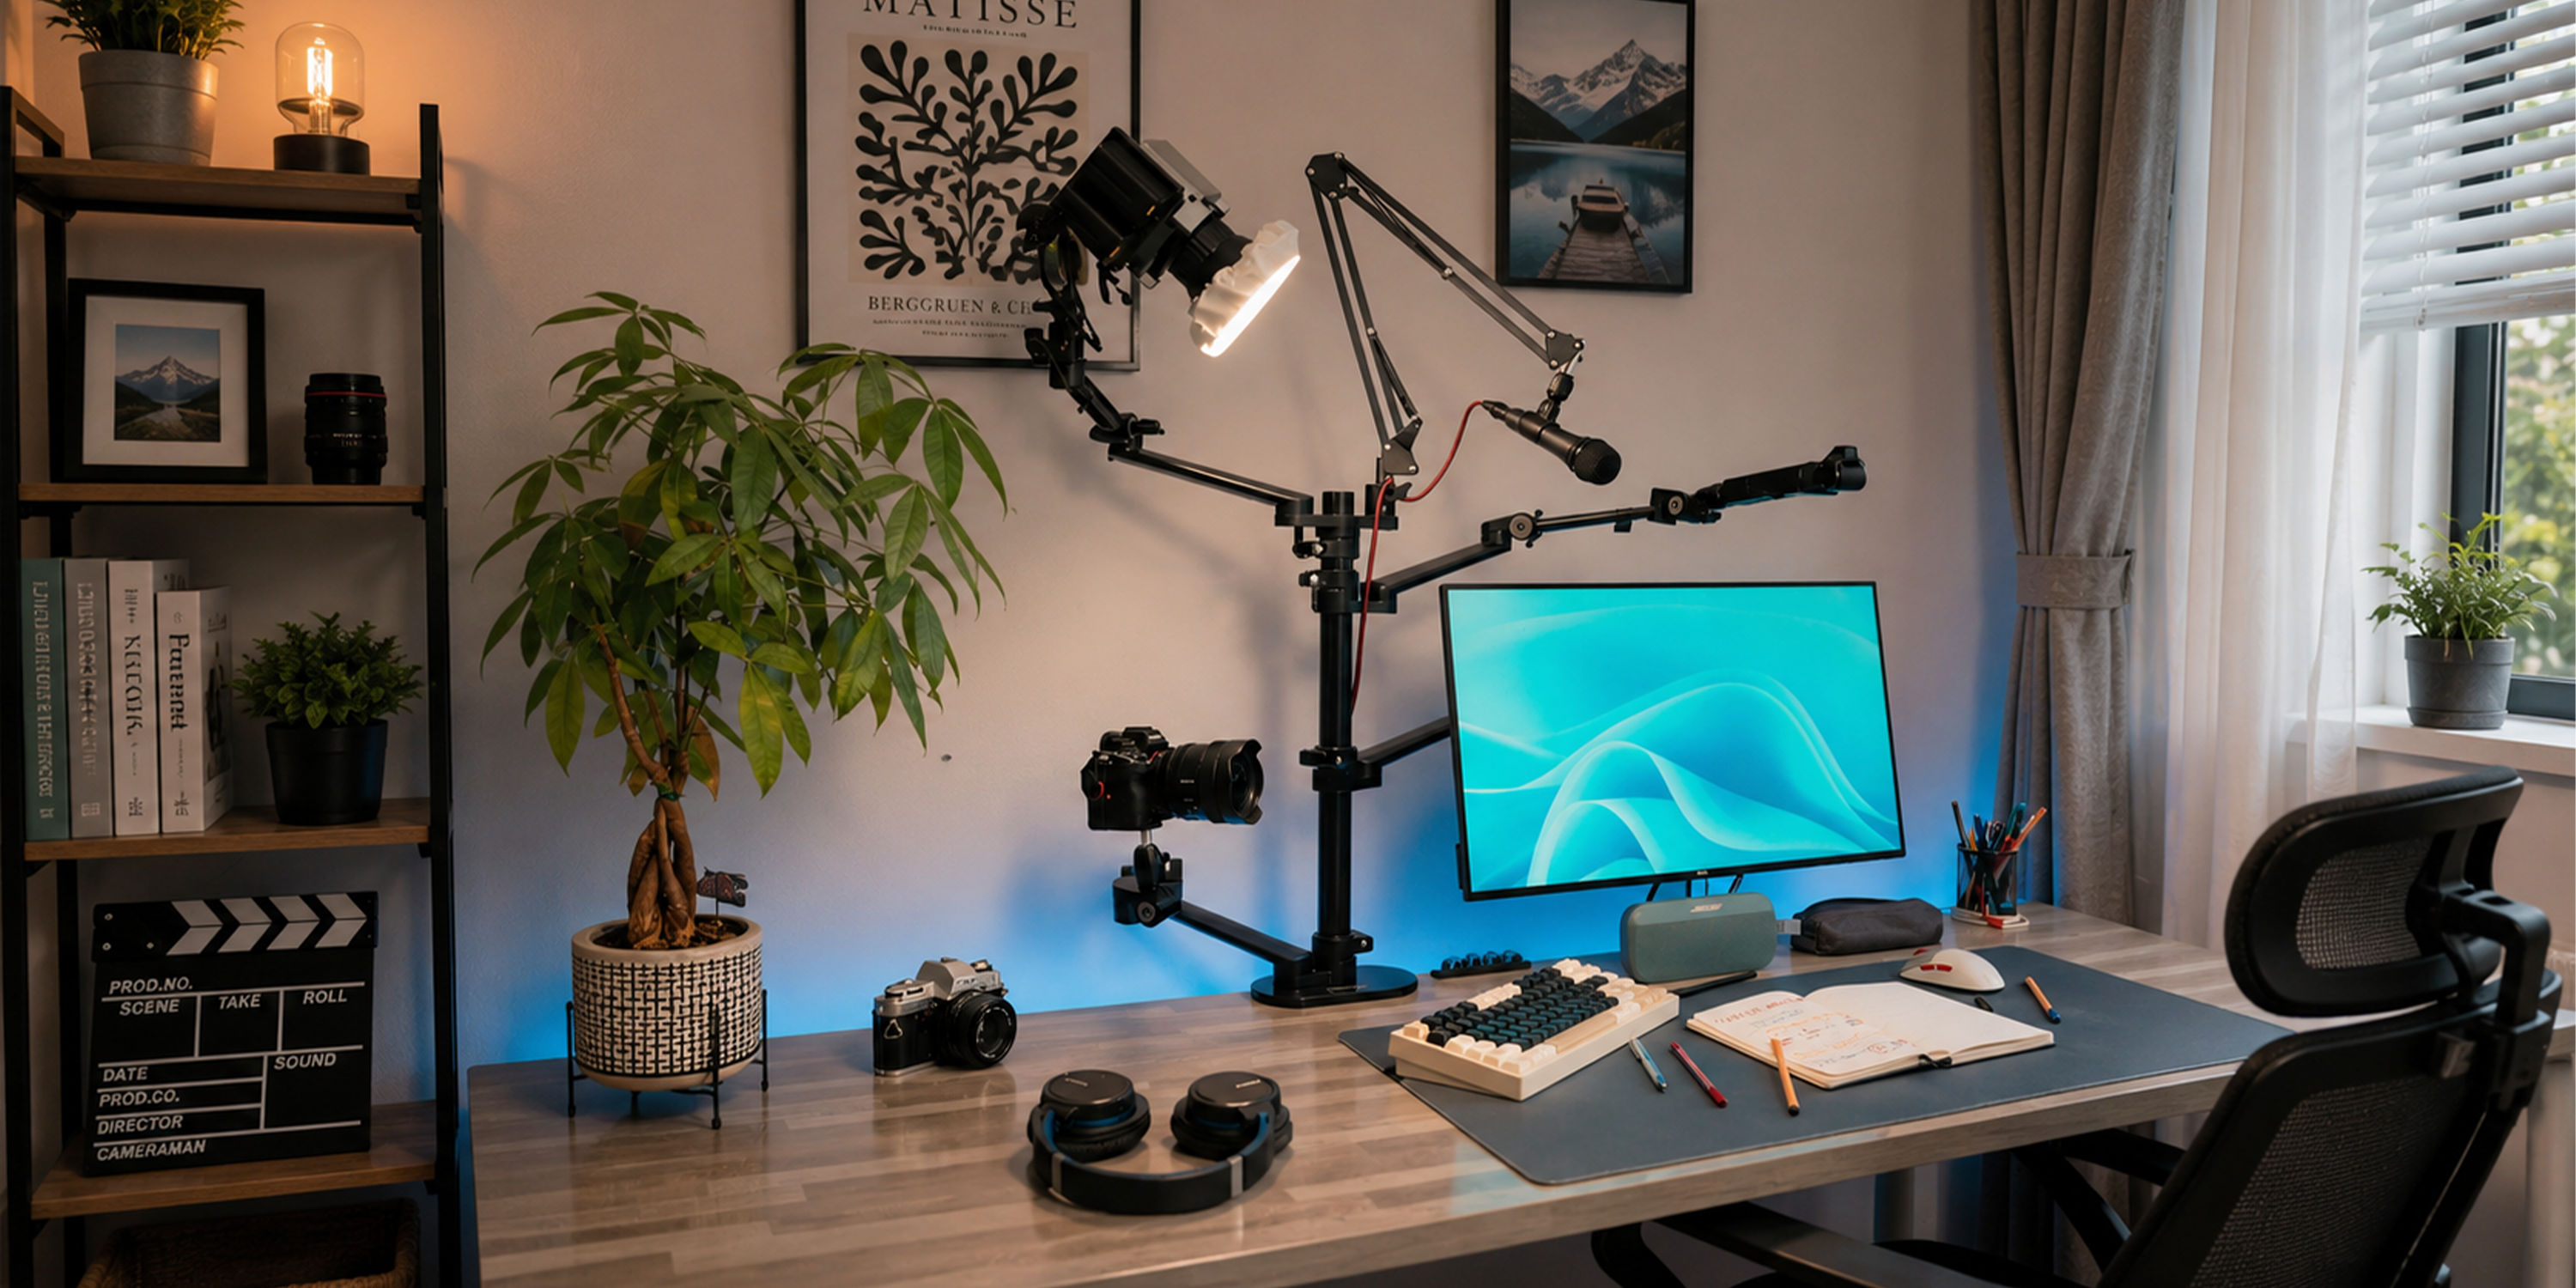
A desktop boom arm solves this differently. It uses a heavy-duty C-clamp to grip the desk edge, extending a multi-jointed mechanical arm toward the center. Your camera, lights, and mic can all hang from the same point, giving the desk back to you.
The Aerial Studio Build Guide: Level 1 to Pro
Level 1: The Overhead Specialist
Perfect for unboxings, crafting, and cooking.
- Gear: 1x Desktop Boom Arm (with C-clamp), 1x Phone/Camera mount.
- Setup: Clamp the arm to the side of the desk (not the front). This allows the arm to "reach" into the center without getting in your way.
- Result: A clean desk. The camera "hovers" above, providing a perfect top-down view with zero clutter.
Level 2: The Multi-Device Setup
For creators who need light and sound simultaneously.
- Gear: 1x High-weight capacity desktop stand, 1x Expansion Cube (with 1/4" threads and cold shoes).
- Setup: Screw the expansion cube onto the end of the arm. Now, you can mount your camera, a small LED light, and a mic all on the same arm.
- Result: One single pivot point serves as a "gear tree," suspending your entire production suite in the air.
Level 3: The Professional Multi-Angle Studio
For dual-camera setups and professional lighting.
- Gear: 2 or 3 boom arms.
- Setup:
Arm A (Main): Eye-level for your face.
Arm B (Top-Down): Suspended above for product details.
Arm C (Lighting): Holding a ring light or softbox at a 45° angle.
- Result: A fully functional studio that exists entirely on the edges of your desk. The center is reserved purely for your creativity.
3 Things to Look for When Buying a Desktop Stand
- Weight Capacity: Calculate your gear weight (Phone + Light ≈ 500g; Mirrorless + Lens ≈ 1.5kg). Always choose a stand rated for 30% more than you need.
- C-Clamp Versatility: Most clamps fit desks between 1.5cm and 7.5cm. Check your desk thickness before buying!
- All-Metal Construction: Avoid plastic joints. Steel or aluminum alloy ensures the arm won’t "sag" over time.
Reclaiming Your Space
The "small desk" problem is often just a perspective problem. When you send your camera, lights, and mics "into the sky," the sense of relief is instant. You have room for your keyboard, your coffee, and most importantly, your elbows.
Stop fighting for desk space. Get a boom arm, get it in the air, and get back to creating.
Share:
TARION Quick Release Camera Strap
2026 European Summer Photography Festivals